I've recently moved into a loft and will be facing one of the most difficult rooms to design for a college student. For those of you that don't know what a loft is, www.dictionary.com defines a loft to be a balcony or platform built over a living area and used esp. for sleeping. Lofts are very open and don't provide any privacy. I would like to create something cheap and stylish that will cover my room without building a wall. This can be done by using drapes or taking the invention of curtains. For this project I will be examining drapes and what we can do to make our own.
 A drape is a horizontally held rod, made of plastic or cheap metal, that holds a long piece of fabric in order to cover a window. There are two brackets that support the load applied by the rod. This picture you see on the left is an actual drape, but I've used it to hold my jackets and dress shirts. This was bought at Ross for $5.99. I needed something that would span 134 inches for one wall and another that would span 77 inches. I indeed found two drapes and the total cost came to be $32.85. As you can see, it was very expensive for a stick and two brackets that held them in place.
My Draping System
What you'll need:
A measuring tape (.99 cent store)
Rod (I used 5 wooden rods from home depot, $1.95 each)
Curtain hangers (used to hold your fabric, 14 for $2.99)
Hook Eye screws (these will be used to support the load carried on the rods)
Copper tube connector (used to connect the rods together)
Copper tube 90 degree connector (used to connect the corner)
Fabric of your desire
Saw (to cut the rods. also bought at the .99 cent store)
total without fabric = $20.60


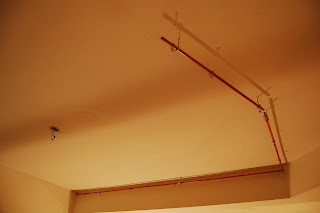
First I measured the dimensions of the area that I wanted to cover. One region was 134 inches, the other was 43 inches and another was 34 inches. Because my rods didn't span long enough I needed to connect them using copper tubes found in the plumbing section of home depot. I cut what was needed to span the area i wanted to cover. The rods were then connected by the copper tubing and held up by the hook eye screws that I put on the ceiling. The curtain hangers can then be slid on and fabric can be easily held by the clips.
This is how it looks.

With fabric

Design Improvements
To give a more fashionable appearance I stained the wooden rods with a 2 in 1 stain and polyurethane paint. If you wanted to save some money you can always take out the curtain hanger clips and directly put the fabric over the rod. This way, you don't need to paint the rod or buy the clips.

I hope you like my drape system. thanks for reading
kudos,
Jeff


No comments:
Post a Comment